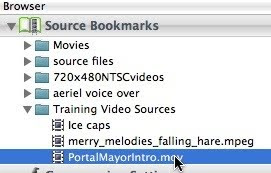
To get started with encoding this file for downloadable streaming for high broadband users in Episode Encoder Pro, we first need to select our source file.
Next, drag it to the Batch area where Drag Source is displayed
Now your source file can been seen in the batch. You can also drag the video file directly to the Batch from a folder or the desktop. Let me talk a little about our source before we move forward. If you select the source and click the Enter button on your keyboard a preview of the video appears.
As my preview appears I want to point out that this source has black banding around the edges. As we encode our video we want to make sure we crop this black out of the video. It will make our output file look so much better. Now we’ll move forward to create a compression preset for our encoding. Keep in mind that these settings will be a good starting point as every source file is different and the encoder will respond differently to each source file you encode.
Open up the Templates and twirl down to the All File Formats Templates.
Once the All File Formats Templates are open navigate to the H.264 Download templates and select the H264_480x360 preset. With the preset selected Control-click and choose Duplicate from the Contextual Menu to make a copy.
You now have a copy of the preset you duplicated. Click where the H264_480x360 copy text appears to rename your preset.
Let’s call your preset H264_600k_DL and select Enter. Notice that we don’t have any spaces the preset name. This is because the preset will be used in the file naming and it’s better to take out all spaces in the encoding process. When you author video content for the web you don’t want to have spaces in your video name.
Once you rename your compression template Double-click the preset to open the setting for customizing.
When your setting is open the Output tab will appear. Since we are encoding a downloadable streaming H.264 file notice that your file extension will be .mp4 and the H.264 codec is used for the video and AAC is used for the audio. You can see that the Hint Prepare for Streaming check box is not selected. Hinting isn’t necessary to use because we’re not targeting this video file for a streaming server.
Next move on to the Video Tab. Twirl down where H.264 is displayed to adjust the settings for the H.264 codec.
For the datarate type in 600 kbps and you can continue to use VBR using VBV. For the buffer, since this is a downloadable video, you can increase your buffer to 10 seconds. This will allow the codec to vary the bit rate more. For the Keyframe distance you can use a value of 90 frames which will provide a keyframe at least every 6 seconds.
Click on the Profile and Quality tab. Notice that 2-pass encoding is selected. Adjust the quality slider to the highest quality of 100 and twirl up the codec setting.
Go to the Frame Rate Filter and twirl down. For the filter mode choose Fixed framerate.
For the Framerate preset you can use Automatic and select 15 fps. Now twirl up the Frame Rate filter.
Twirl down the Deinterlace filter and choose Automatic Detection for the Field Order. This fact that this setting is available is great because with compression it’s always good to know you field order. Choosing the Automatic Detection value takes the guess work out and the codec will determine the field order for you. Go ahead and twirl up the Deinterlace filter.
Now twirl down the Resize filter.
For the output size you can leave it at 480 x 360. You can choose Cut for Maintain proportion with.
For the cropping values we’ll multiply the 4:3 aspect ratio by 8 and crop 32 x 24 pixels. So crop 12 pixels off the top, 12 pixels off the bottom, 16 pixels off the left and 16 pixels off the right.
Since we’re dealing with video from an analog source we need to apply a Noise Reduction filter. Navigate to the Noise Reduction filter and click the check box to make it active.
Now, twirl down the Noise Reduction filter to adjust the values. Check Median and Only Filter Chroma to apply the filter only on the Chroma channel. Leave the other values at the default. Twirl up the Noise Reduction filter.
Let’s move to the Audio tab.
Click on the Bit Rate Pop-up Menu and choose 32 kbps.
You can leave Stereo selected for Channels and 44.1 kHz selected for the sample rate.
Now that were are finished making our adjustments click the Save Setting button to the top right on the Episode Encoder Pro interface.
Click the Close Setting button.
Next, select the H264_600k_DL setting that you created
and drag it onto your DV.mov video source.
You can see that your compression preset appears right below the video source. Before we start encoding let’s look at something. Select the H264_600kDL preset and click the Enter key.
A preview of your video output appears with the cropping values applied under the Resize filter. Our black edges no longer appear. Time to encode your video file.
At the bottom right of the Episode Encoder Pro interface click the Start Encoding button.
You can watch your progress under status. This will show you how much time you have left.
Once your video has finished encoding your status will switch to Done. You have now encoded an H.264 downloadable streaming video using Episode Encoder Pro.
